- Install AD Reports
- Uninstall AD Reports
- Register AD Reports
- Run a report
- Run Azure User Reports
- Azure Authentication Settings
- Create Custom Azure Reports
- Create Custom Reports
- Use Report Wizard
- Apply LDAP Filter to other Reports
- Save Reports for All Domains
- Load User Membership
- Load Group Members
- Generate a report: Users in Group
- Generate a report: Users Not in Group
- Run a report with not-replicated attributes
- Export a report
- Preview, Print, Email
- Add, Edit Domain
- Update Domain Credentials
- Schedule Reports
- Use Scheduler Service
- Test Scheduler Service
- Exclude Domain Controllers
- Add Company Logo
- Set Email Settings
- Save and Load Report Settings
- Enable High DPI Support
How to create Custom Reports
Active Directory Reports provides dedicated functionality for creating custom reports by modifying the existing reports and saving them as customized versions. There are two methods available to achieve this.
Method 1
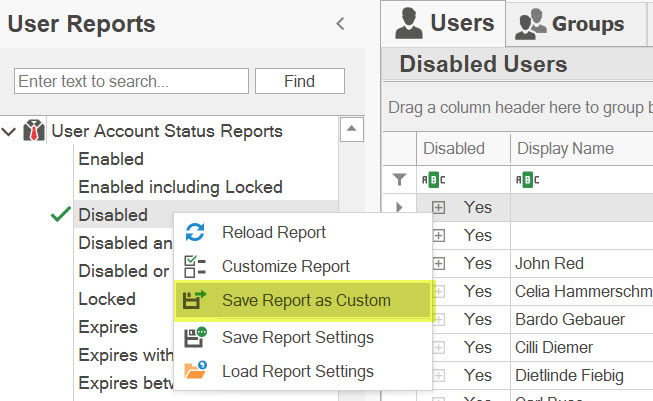
Simply right-click on any report in the report tree and choose the Save as Custom option from the context menu.
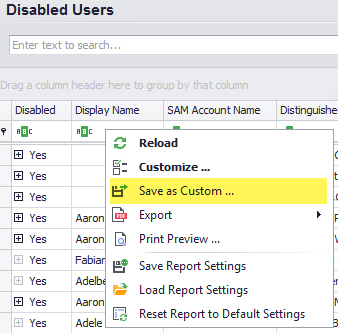
You also have the option to select the same item from the grid pop-up menu for loaded reports.
Alternatively, you can also select the same item from the toolbar for loaded reports.

In the confirmation dialog, enter the report title and click Save.

Method 2
To create a custom report using the Report Wizard, you can choose the Customize... menu item from the pop-up menu of the report tree, grid, or toolbar. This action will open the Report Wizard, allowing you to customize the selected report and save it as a custom report.
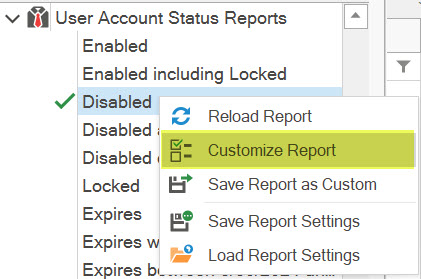
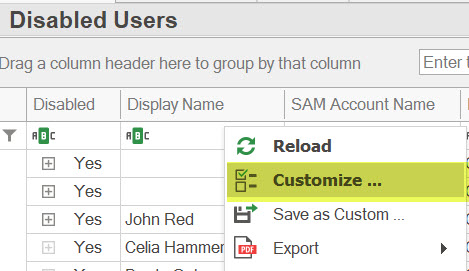
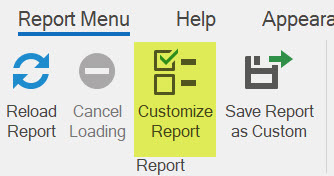
Within the Report Wizard, you have the flexibility to modify various aspects such as the search root, search scope, LDAP filter string or attributes, maximum number of objects to load, and report membership settings.
To understand how to utilize the Report Wizard, we recommend reviewing the dedicated section that provides detailed instructions How To Use Report Wizard.
Report Wizard - LDAP Filter Builder
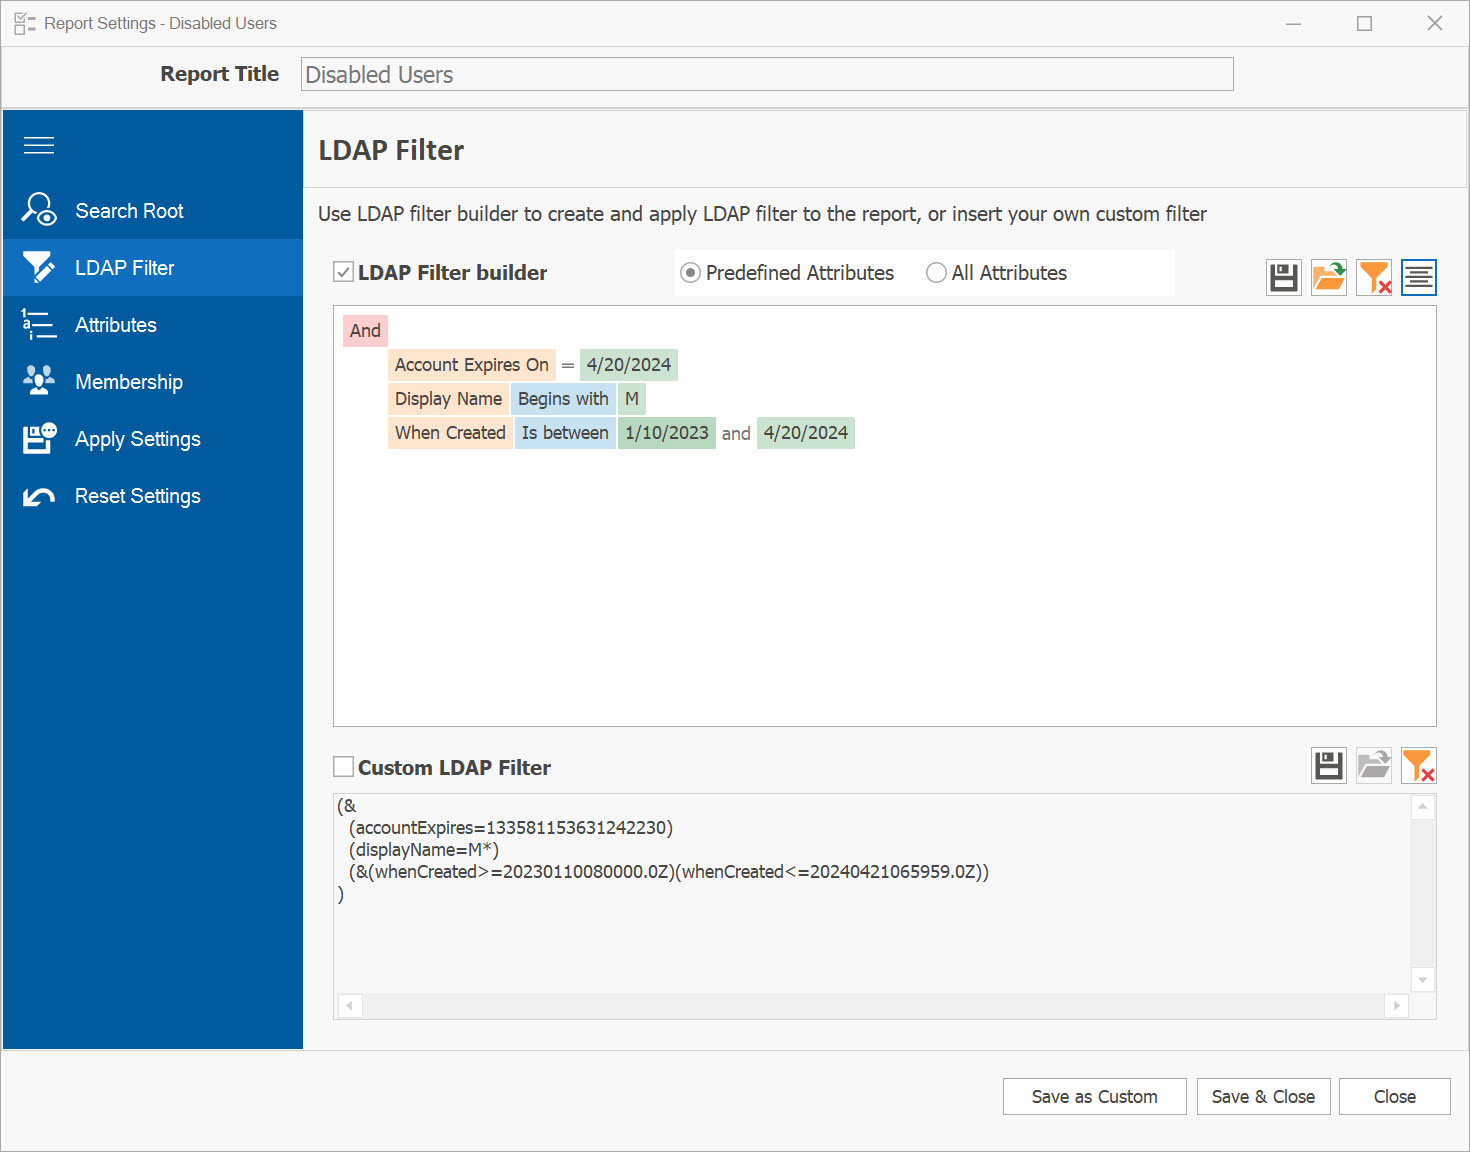
Once you have completed the customization of your report, click on the Save as Custom... button located at the bottom of the wizard window. Regardless of the method chosen, clicking on Save as Custom... will prompt the appearance of a Save dialog box. In this dialog box, you can enter the desired name for your custom report (by default, the initial name of the predefined report will be displayed). You also have the option to specify whether you want to save this report for the current domain only or for all domains. After making your selections, click on Save to save the custom report.

Your newly created custom report will be saved within the Custom Reports section and automatically categorized based on its report type.
For instance, if the report pertains to Users, it will be added to the User custom reports category.

There is no limit to the number of custom reports you can create and save. This functionality proves particularly useful if you prefer not to change the default settings of predefined reports or if you wish to create distinct versions of the same report with different configurations.
Additionally, Saving a Report for All Somains ensures it will be accessible under the Custom tab, regardless of the currently selected domain.
Custom reports also offer the advantage of utilizing the Scheduler. You can tailor your reports to meet specific requirements and schedule them to run at desired intervals, streamlining and expediting your Active Directory audit process.
When you run your report, the current report settings will be displayed in the "Selected Report Settings" window.

If you have any further questions or require any assistance, please do not hesitate to contact us. We are here to help Contact us.