How to Set Email Settings
Open Email Settings Form
To access Email Settings, click on the Application Settings button in the ribbon toolbar and go to the E-Mail page.

SMTP Settings Configuration
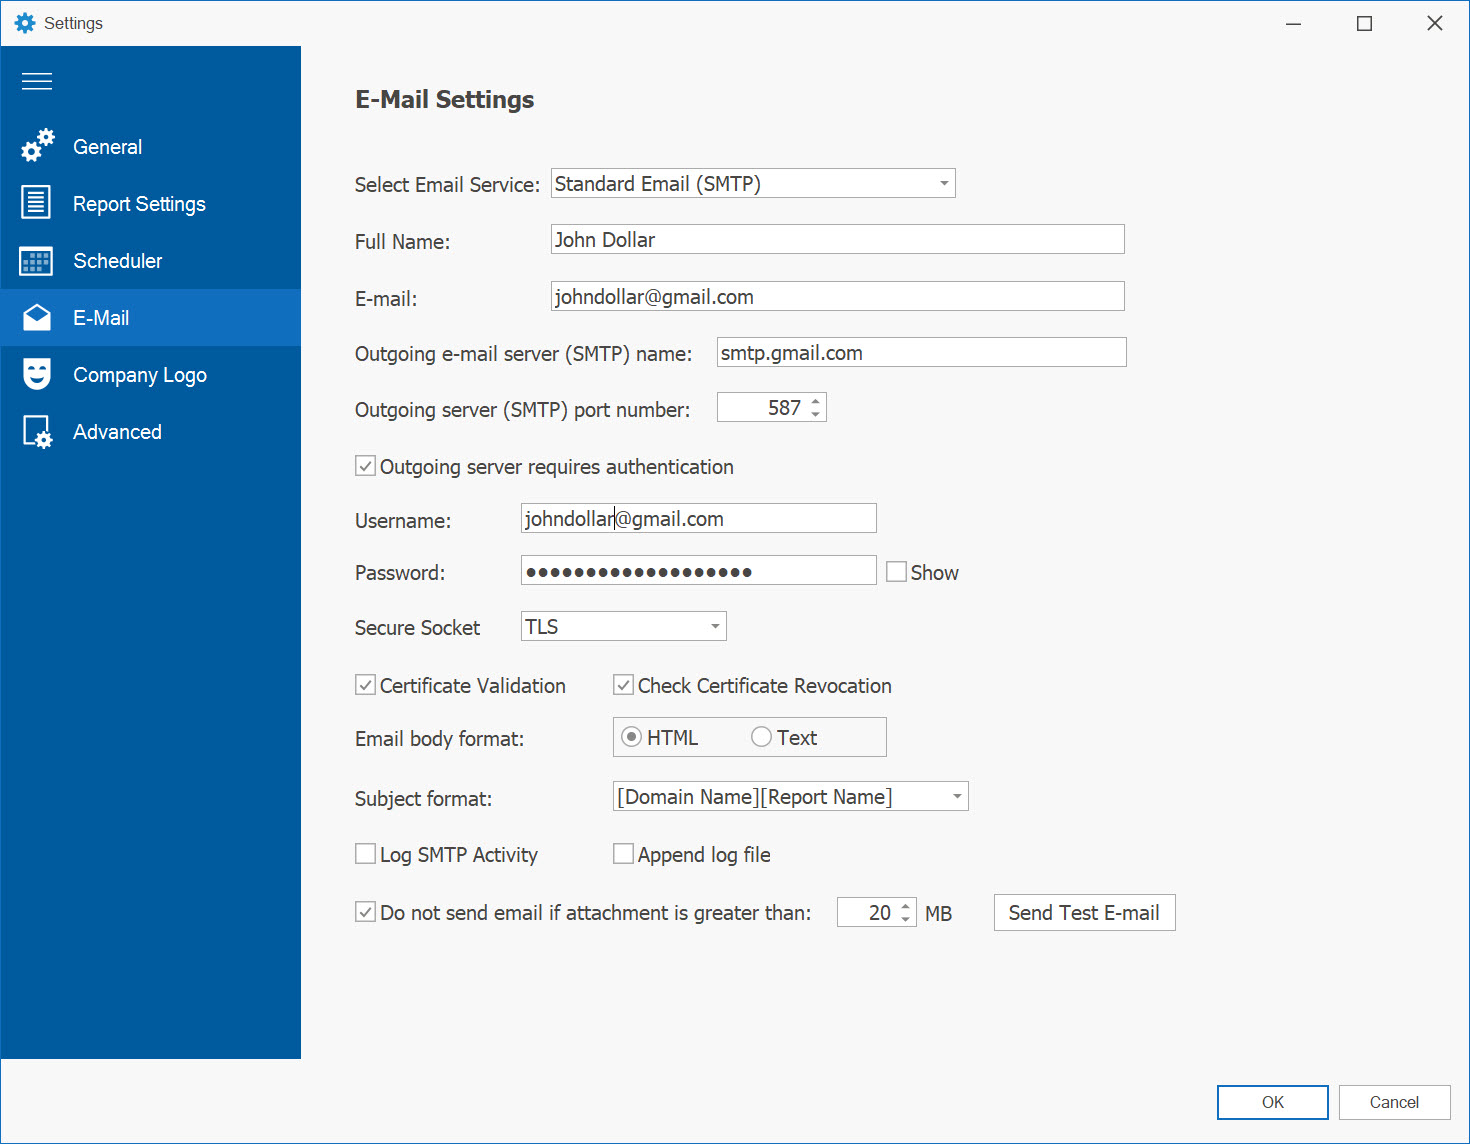
In the SMTP settings form, enter the following information:
- Full Name and email address for sending emails.
- Outgoing SMTP mail server and port number.
- If the mail server requires authentication, check the box and provide the username and password.
- Select a secure connection type if required (SSL, TLS, Auto).
- In the Subject Format line, choose whether to use the report name as the subject or enter a custom subject.
- Specify the desired email format: HTML or Text.
- Optionally, set a maximum file size for reports and choose not to send an email if the report exceeds this size.
Click the OK button to save your SMTP settings.
Gmail OAuth 2.0 Configuration
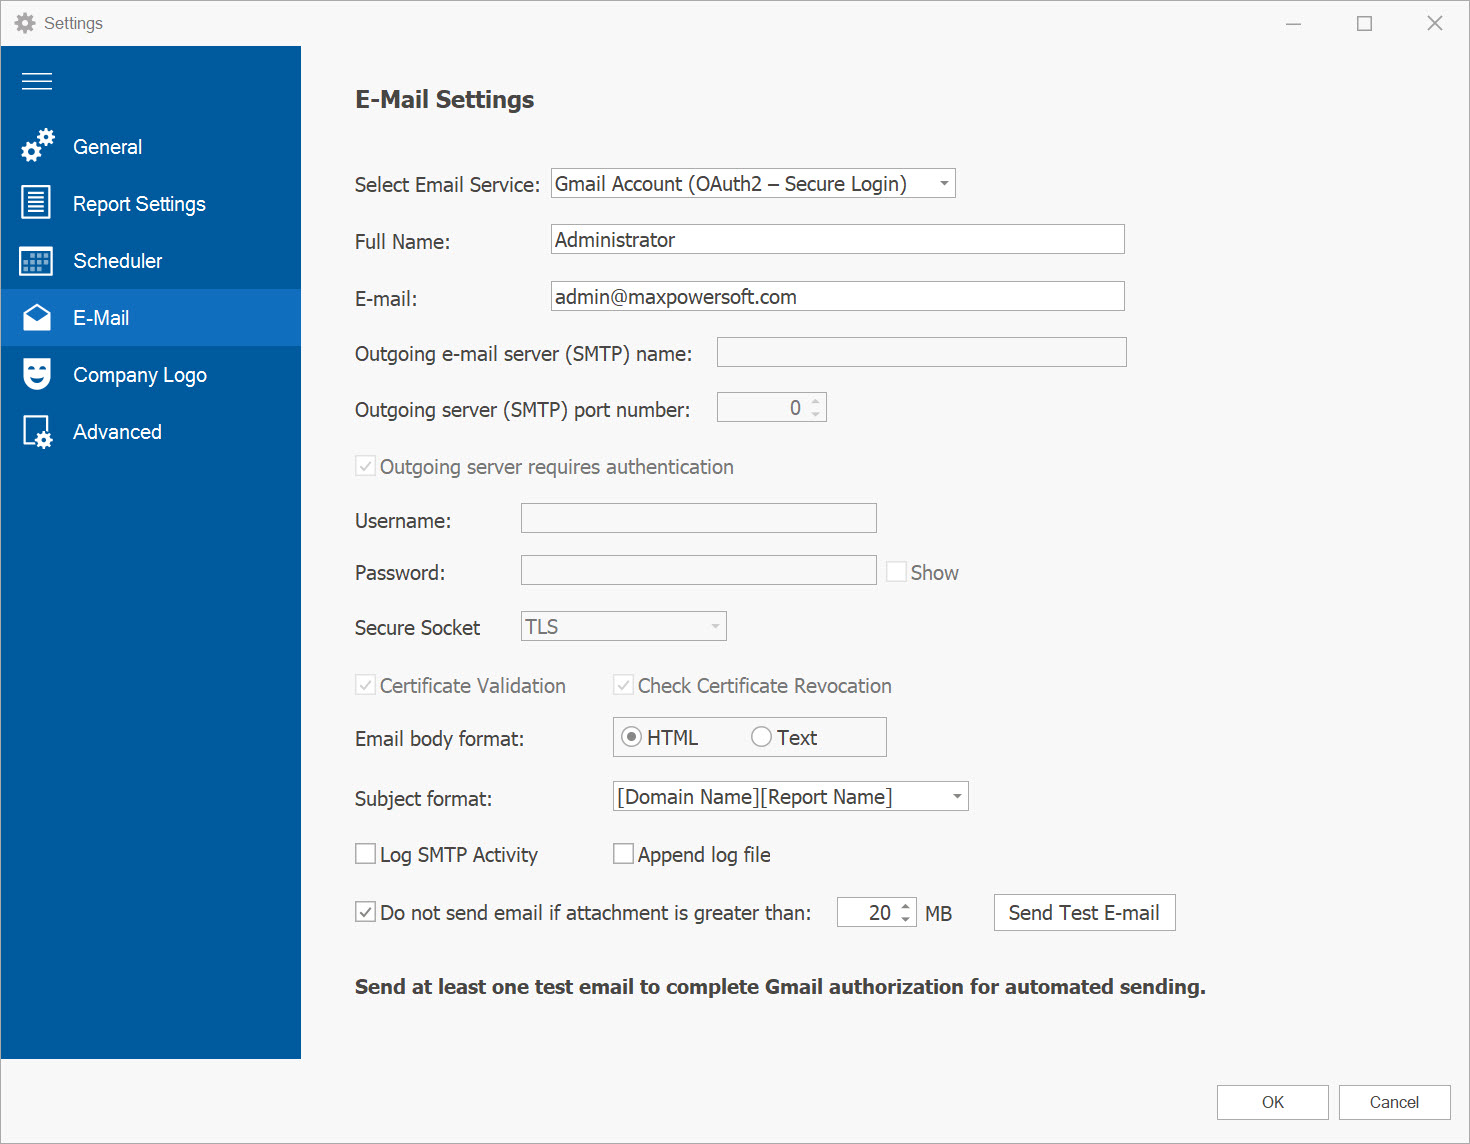
To use a Gmail account with secure OAuth 2.0 authentication (required by Google as of March 14, 2025), follow these steps:
- Select Gmail Account (OAuth2 - Secure Login) from the "Select Email Service" dropdown.
- In the Full Name field, enter your full name.
- In the E-mail field, enter your Gmail address (personal or Google Workspace account).
- In the Subject Format line, choose whether to use the report name as the subject or enter a custom subject.
- Specify the desired email format: HTML or Text.
- Optionally, set a maximum file size for reports and choose not to send an email if the report exceeds this size.
- Click the Send Test E-mail button to initiate the authorization process.
- In the Google Authorization screen that opens in your browser, sign in and click Allow to grant the Send Email scope for AD Reports.
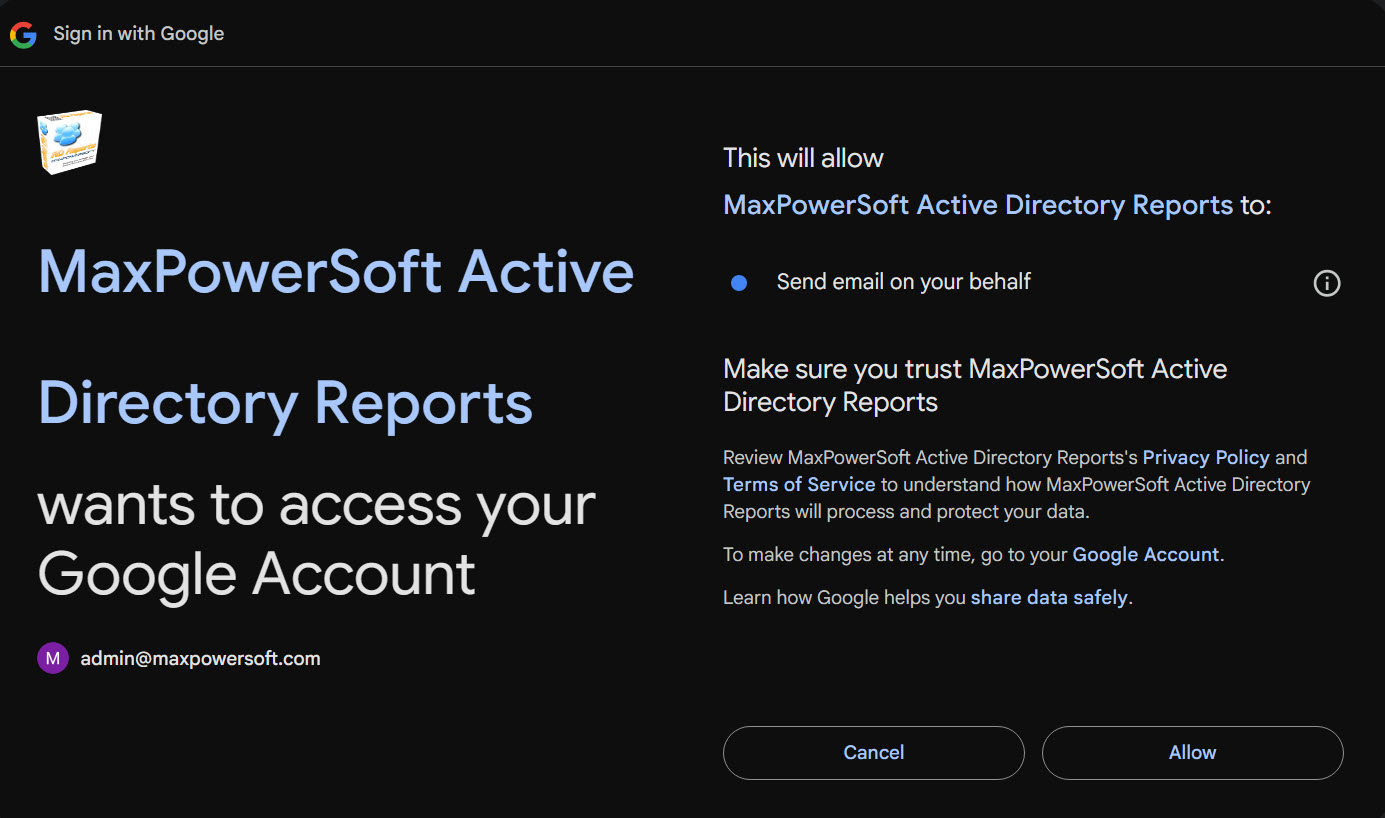
- After authorization, a test email will be sent, and Gmail integration will be finalized for automated sending.
- AD Reports automatically configures the Gmail SMTP server, port, and authentication details when using OAuth 2.0. No manual SMTP settings are required for Gmail.
Click the OK button to save your Gmail OAuth 2.0 settings.
Microsoft OAuth 2.0 Configuration
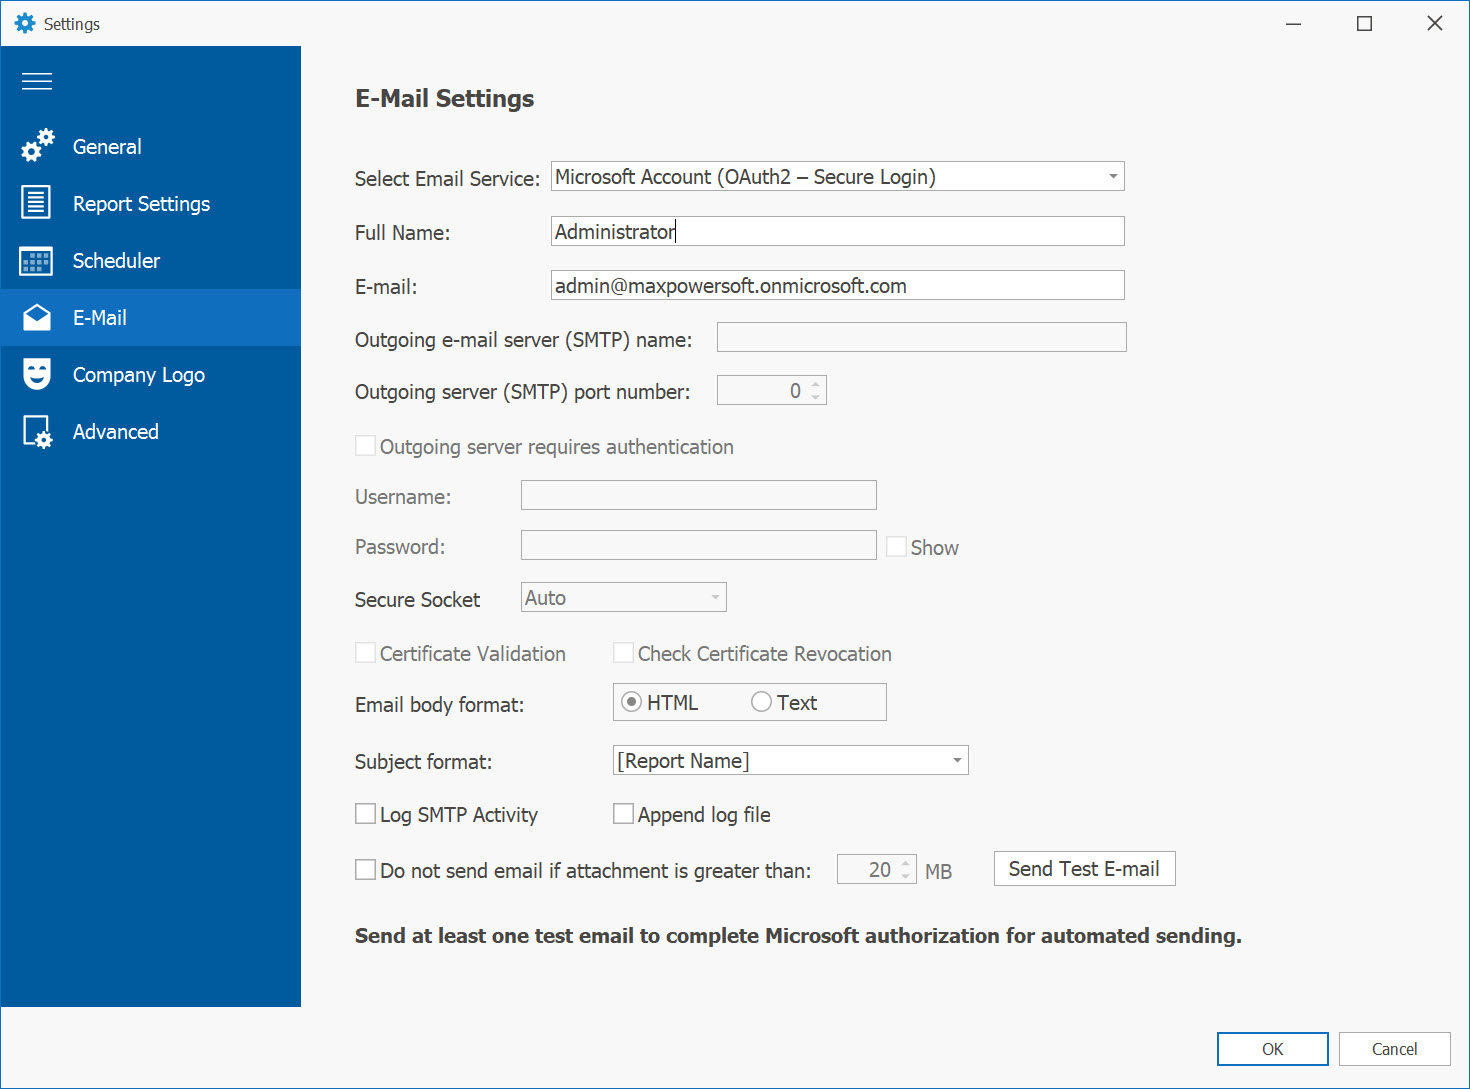
In the Microsoft OAuth 2.0 settings form:
- Set the Select Email Service to Microsoft Account (OAuth2 – Secure Login).
- Fill in the Full Name and E-mail fields. Your Microsoft account (e.g., admin@yourdomain.com) should be used here.
- No SMTP server or password is required when using Microsoft OAuth2.
- Select the desired email body format: HTML or Text.
- Choose a Subject format that suits your reporting needs.
- Optionally, enable log options and set a file size limit for sending attachments.
Click the Send Test E-mail button. A secure Microsoft login window will appear prompting you to authorize MaxPowerSoft Active Directory Reports to send email on your behalf.
After successful authorization, Microsoft will return a secure token that will be stored and used for future automated email delivery. No password or SMTP credentials are stored or required.
Troubleshooting OAuth 2.0
If you encounter issues during OAuth 2.0 setup, check the following:
- Authorization Failed: Ensure you're signed in with the correct account (it should be the same as in the OAuth2 settings) and have granted all requested permissions.
- Test Email Not Sent: Verify your internet connection and try clicking Send Test E-mail again.