How to Use Scheduler Windows Service
Open the Scheduler Service Dialog
To open the Windows service dialog, click on the Scheduler Service button or the Scheduler Service icon located in the bottom right corner of the application.

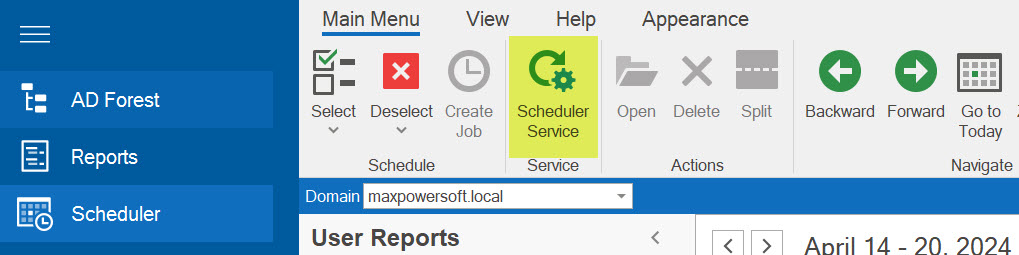
Alternatively, you can open it by clicking on the Scheduler Service button from the Scheduler Main Menu.
Start the Service
The window for the Scheduler Service will appear.
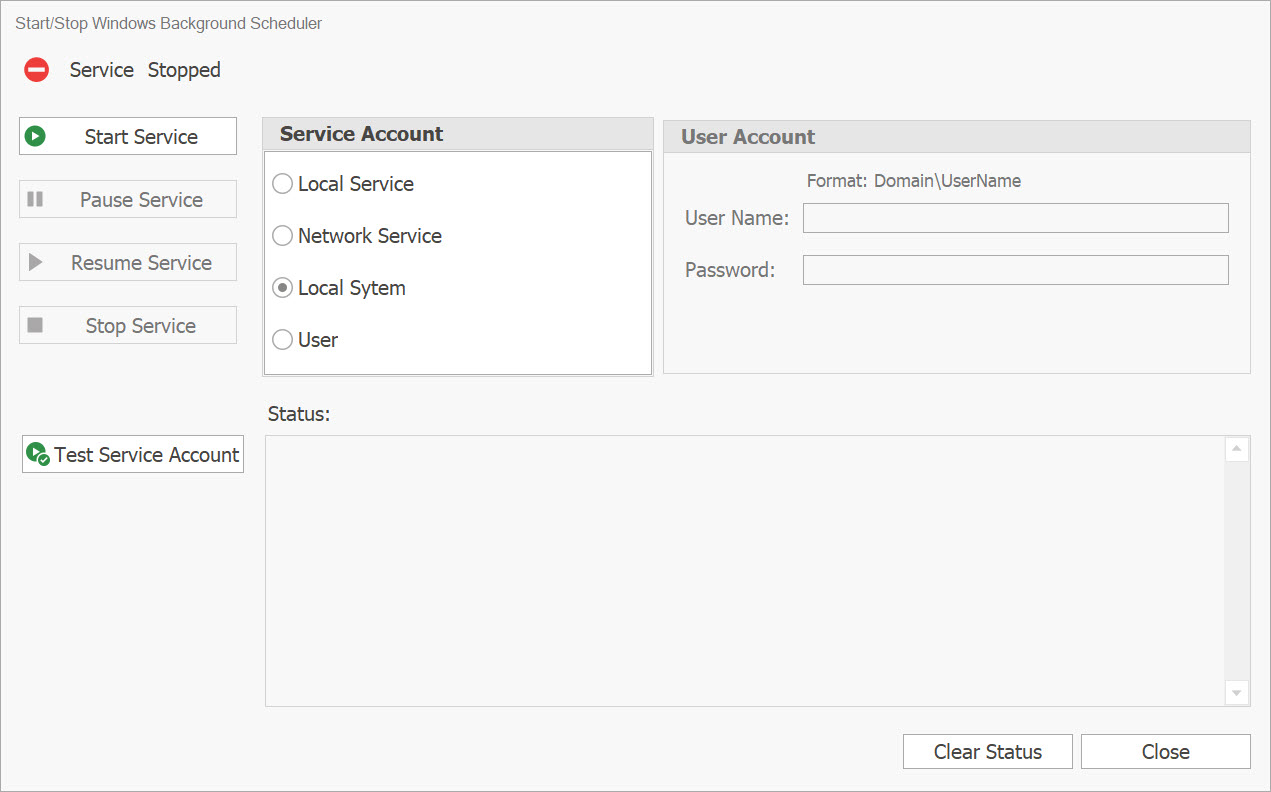
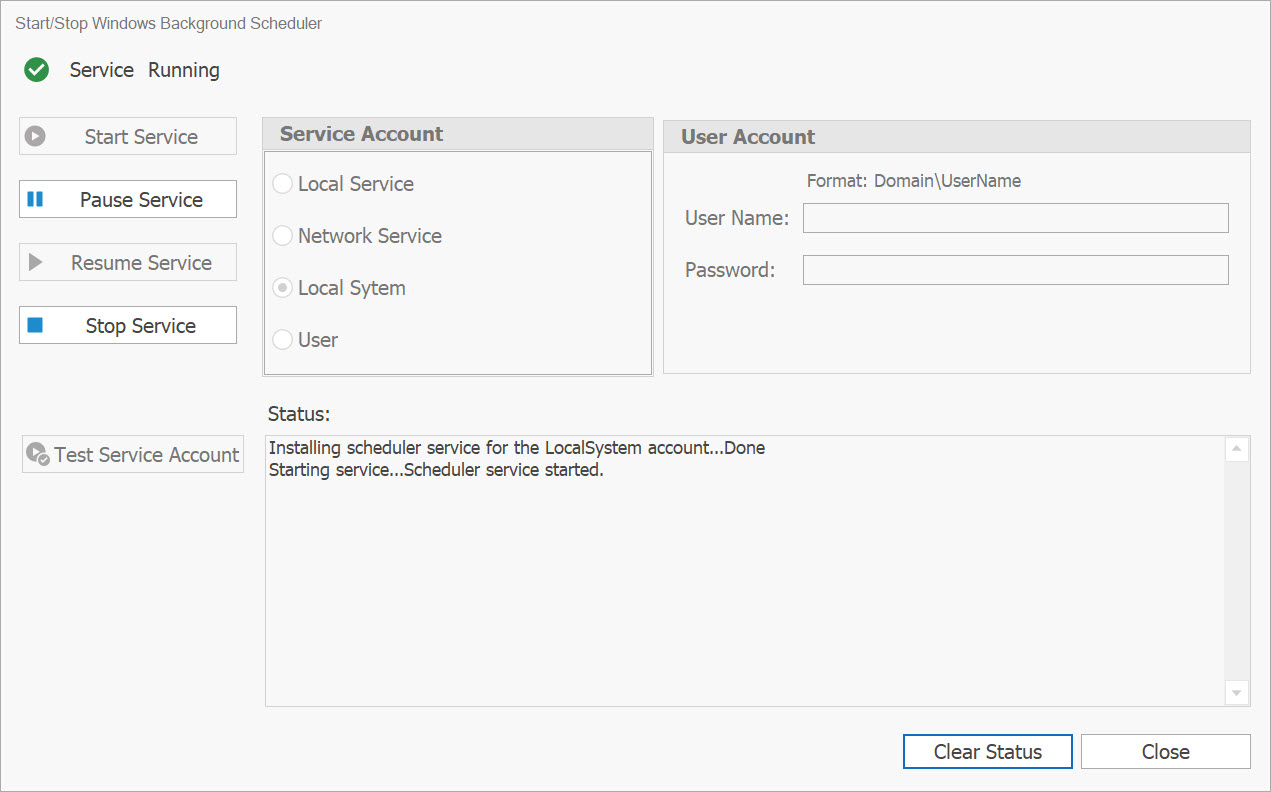
The Scheduler Service is initially in a Stopped state by default. To activate the Scheduler as a Windows Service, click the Start Service button.
The AD Reports Scheduler service should be visible within the list of currently active Services.

Service Status Indicator
If the background Scheduler Windows Service is in the Running state, an indicator will appear in the bottom right corner of the main window for the AD Reports application.

Stop the Service
To stop the Scheduler windows service and activate the internal application scheduler service in AD Reports:
- Open the Scheduler Service dialog
- Click on the Stop Service button
This action will terminate and uninstall the service while enabling the internal application scheduler. To execute scheduled reports, ensure that the AD Reports application is running.
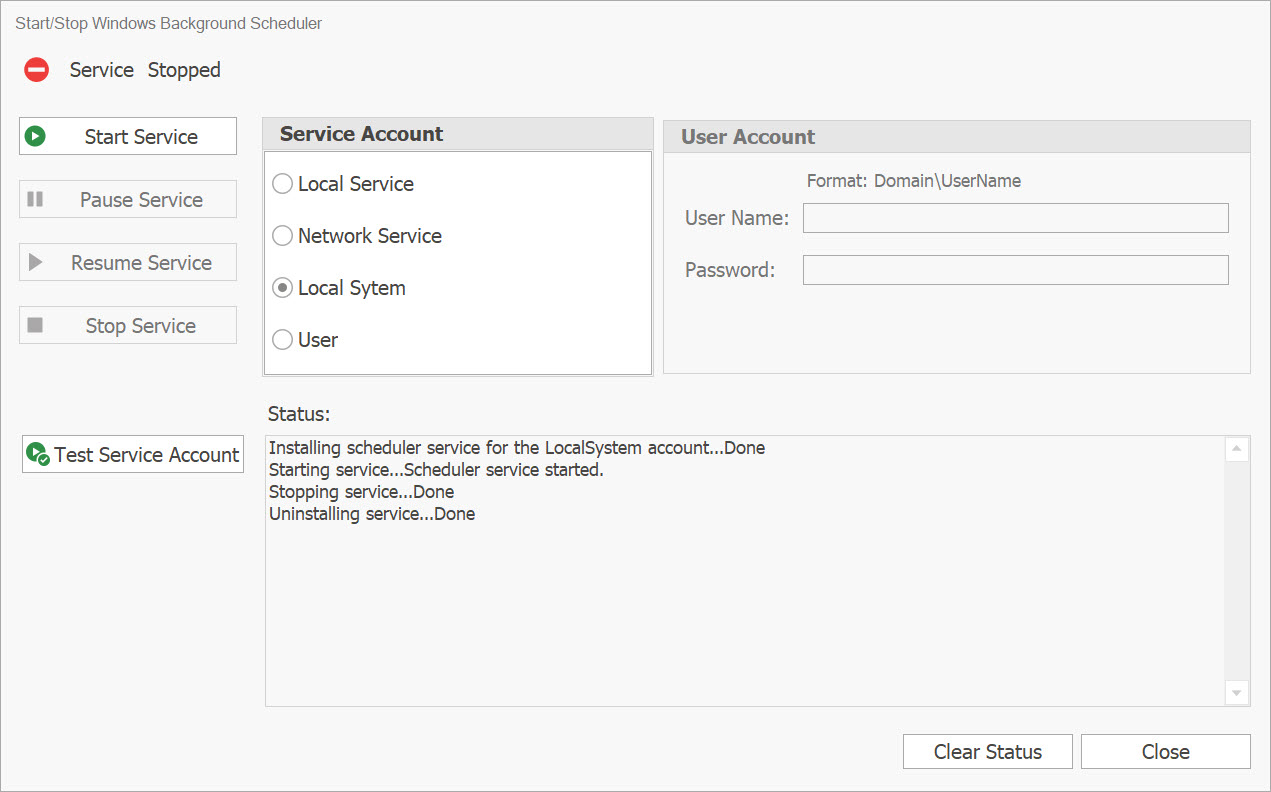
The service indicator will change to a Stopped status.