How to Use Report Wizard
With the built-in Report Wizard of AD Reports, you have the capability to modify any existing report or customize it and save it as a new custom report. Simply right-click on the report from the report tree and choose the Customize... option to begin the customization process.
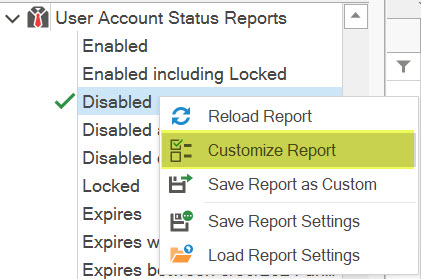
For reports that have been loaded, you have the option to select the same item from the grid's pop-up menu.

Alternatively, you can also select the same item from the toolbar.

The Report Wizard window consists of six pages: Search Root, LDAP Filter, Attributes, Membership, Apply Settings and Reset Settings.
Search Root Settings
In this page, you can select the search root, which represents the starting container for the search process of the selected report. The search root is set to the selected domain by default.
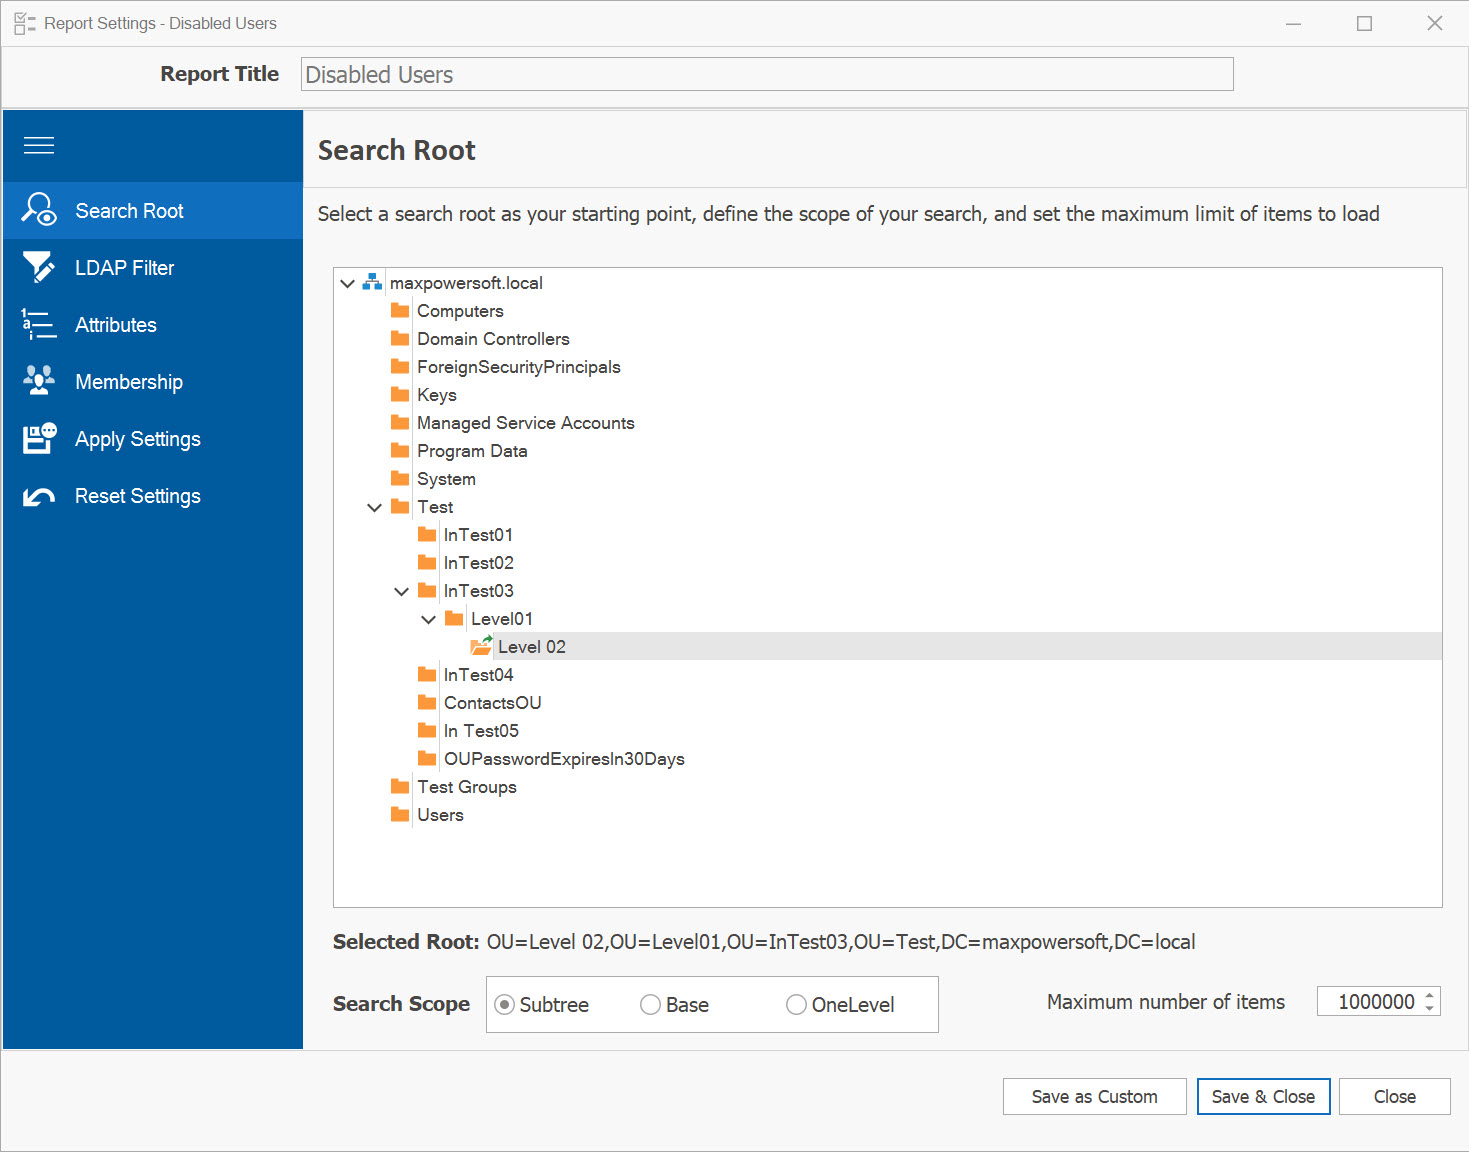
Underneath the Search Root tree, you can select from the available search scopes: Subtree, Base, or One Level. The default selection is Subtree.
Within this page, you can also set a limit on the maximum number of objects to be loaded.
LDAP Filter Settings
In this page you can craft your custom LDAP filter query and incorporate it into your report. You also have the option to save your LDAP query for future use in other reports, or include your own custom LDAP filters in text format.
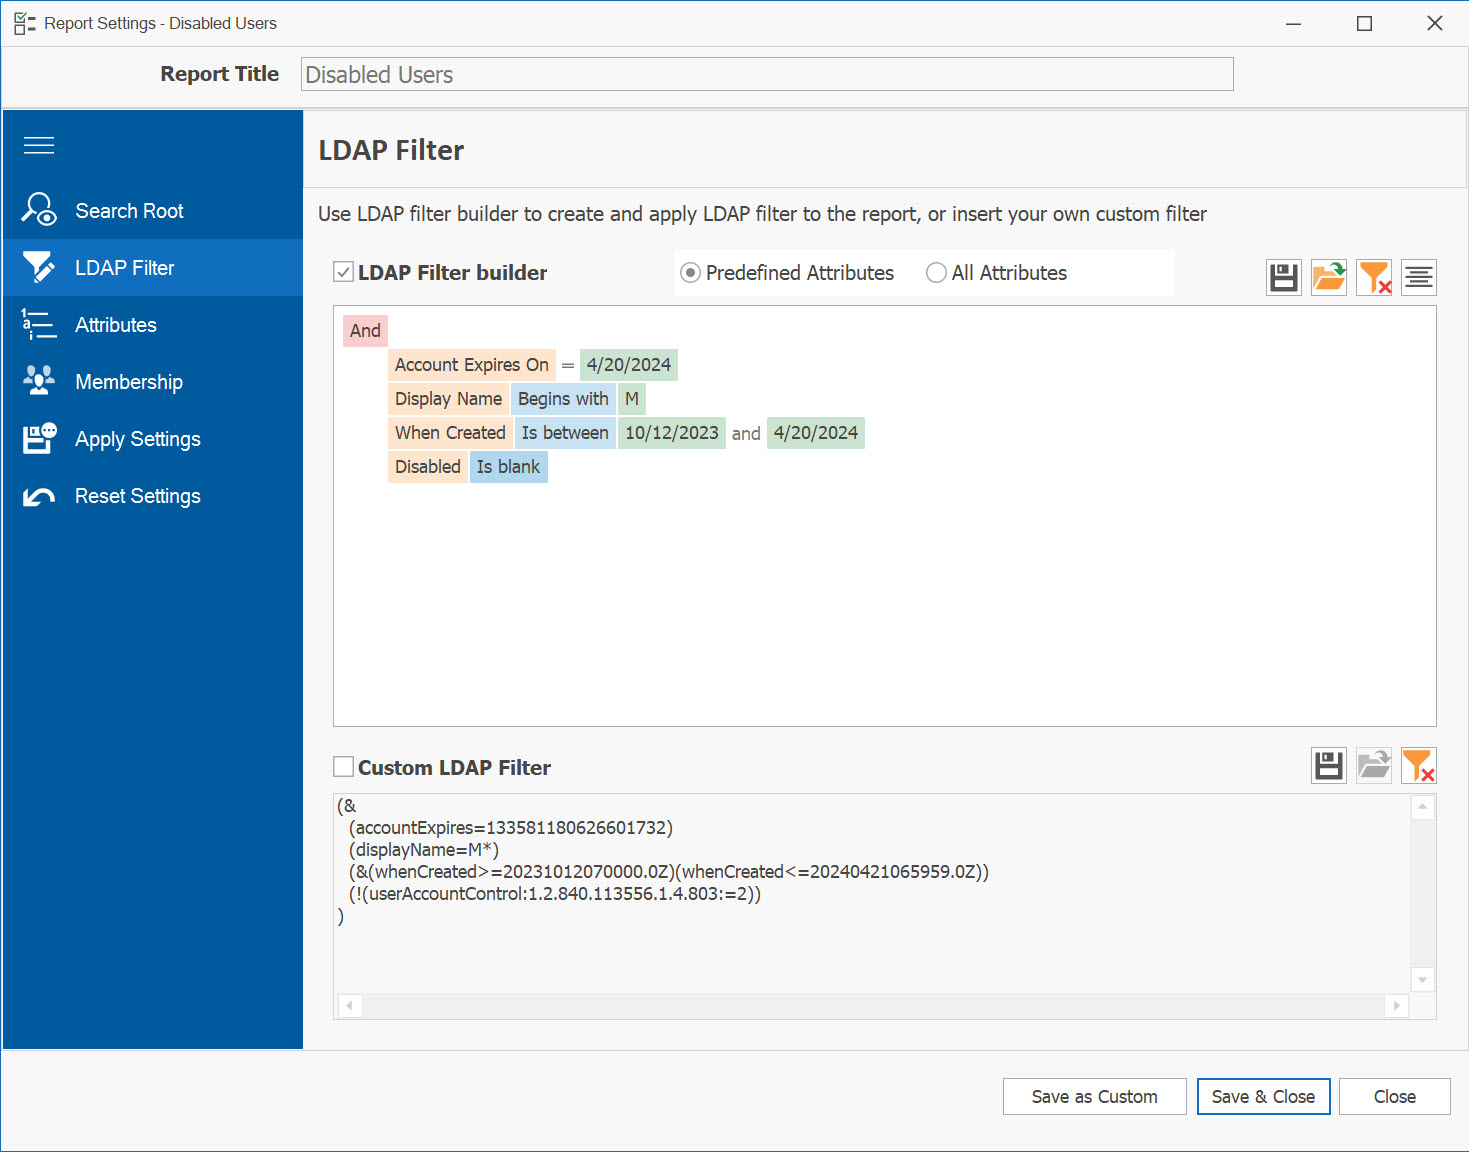
To utilize the built-in LDAP filter builder, ensure that the Use LDAP filter checkbox is checked.
- Click on the small plus sign next to the condition group to add a filter condition line.
- This line comprises three components: the attribute name, the condition, and the value.
- To modify it, click on the attribute name and select the desired attribute from the list.
- Clicking on the condition will present a list of available conditions specific to the selected attribute.
- Enter the value in the corresponding text box. Your filter will be automatically converted into the LDAP filter string.
You can add multiple condition lines as needed. To include another condition group, click on the condition group name (e.g., "And" or "Or") and select it from the list.
To use your own personal custom LDAP filter, check Custom LDAP Filter checkbox and input or paste your LDAP filter accordingly. The filter toolbar
 offers additional functionality such as Saving, Loading, Clearing and Formatting your LDAP filter.
Attributes Settings
Within this page, you have the ability to choose which LDAP attributes to load for your reports.
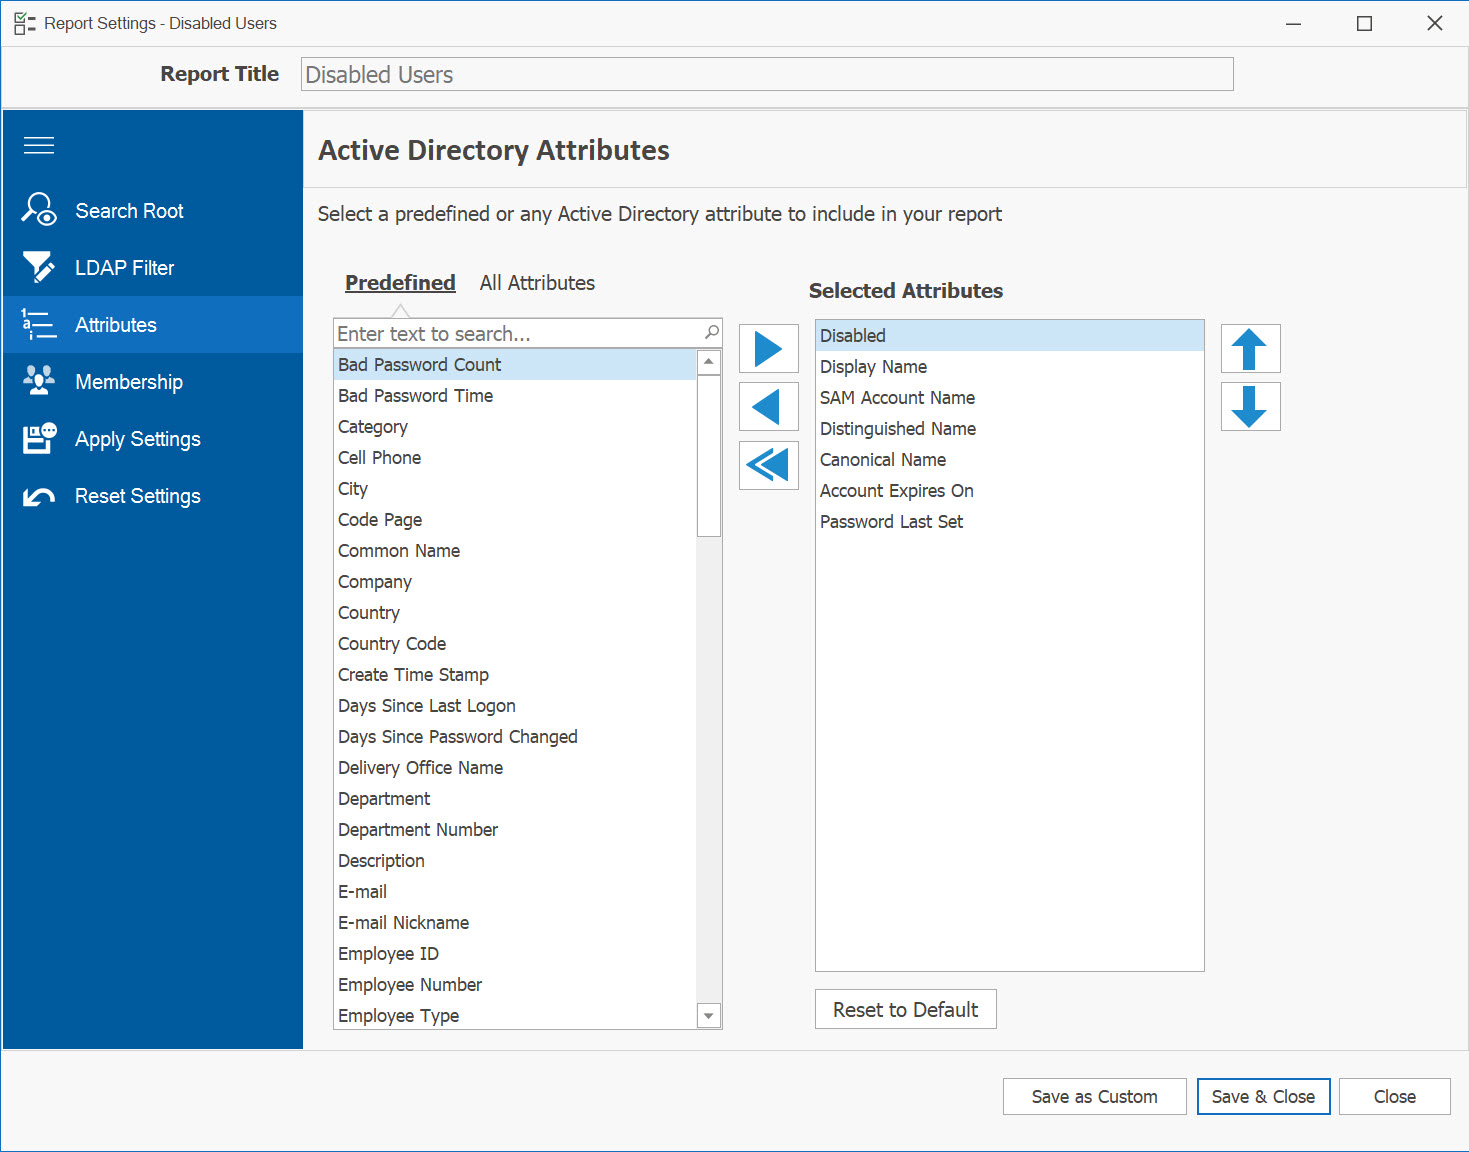
You have the option to choose any attribute from the Predefined list of attributes (selected by default) or switch to the All Attributes list to select any Active Directory attributes. By clicking the Right Arrow button, the selected attributes will be moved to the Selected Attributes list on the right. You can also rearrange the order by clicking the Up and Down arrows.
The Predefined Attributes list includes commonly used attributes, whereas the AD Attributes list contains all other LDAP attributes specific to the selected report category.
If you want to start fresh, you can click the Reset to Default button to reload the list with preselected attributes.
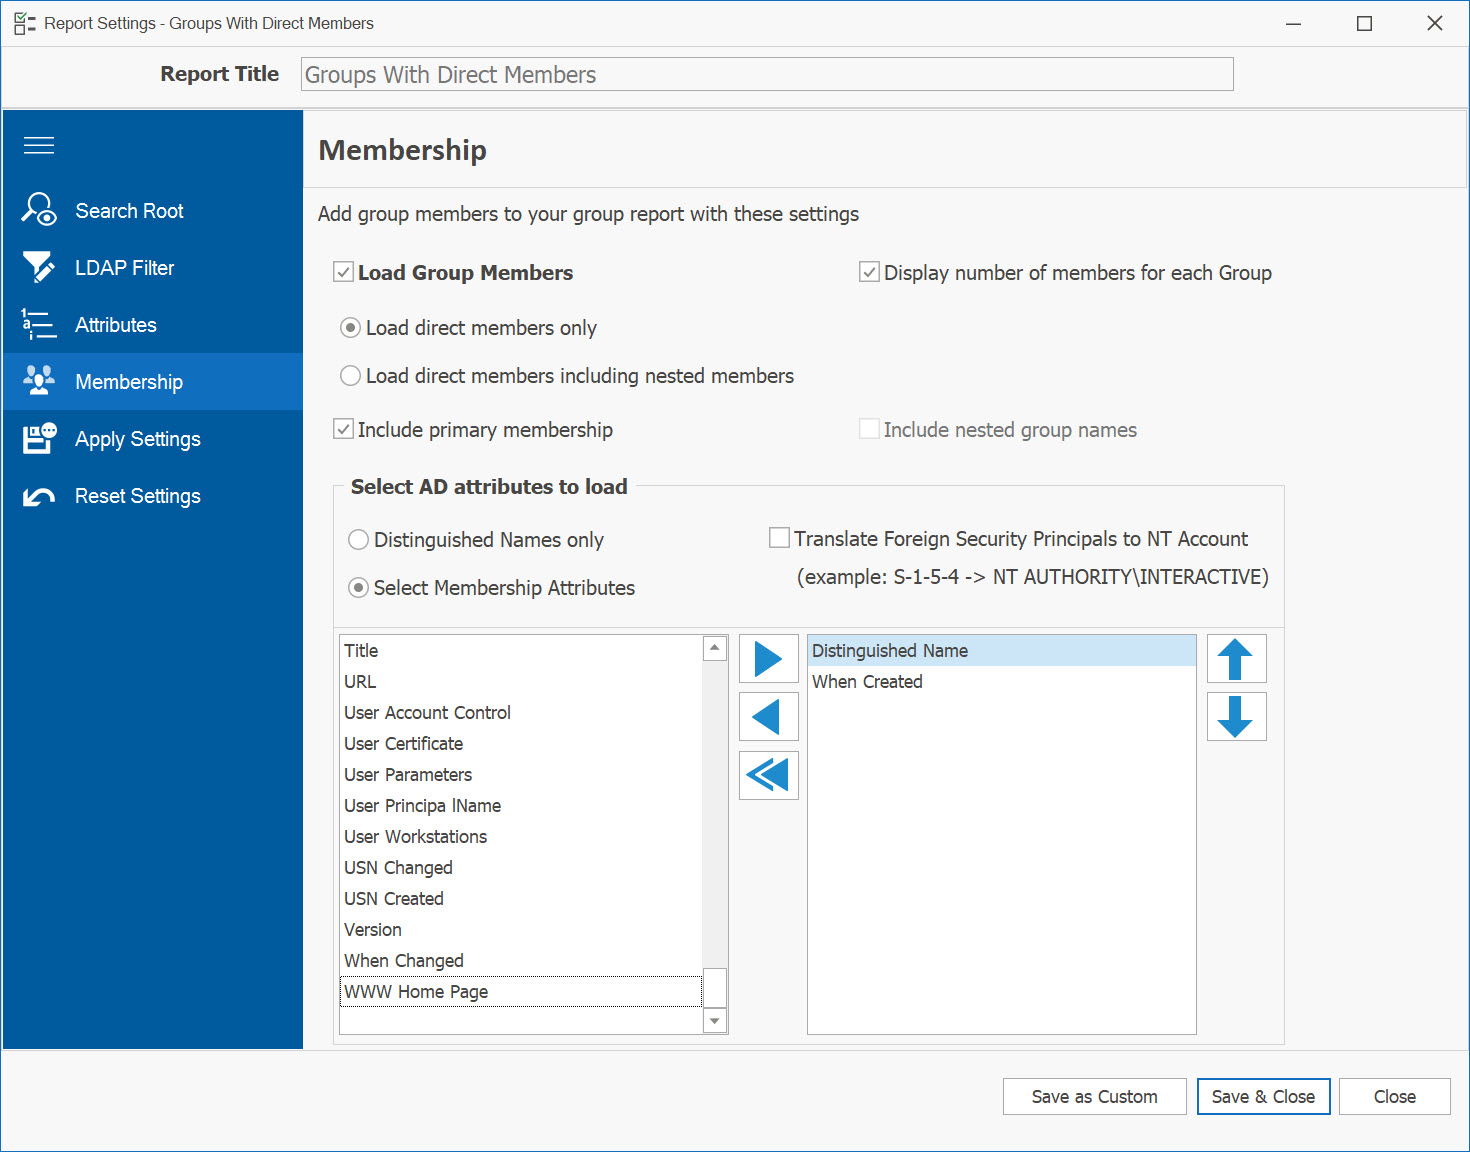
Membership Settings
Within this page, you can include Group Members or User Memberships in your report. By default, this option is disabled. To activate it, check the Load Group Members checkbox (or Load User Membership for User reports).
Group Members Settings
User Membership Settings
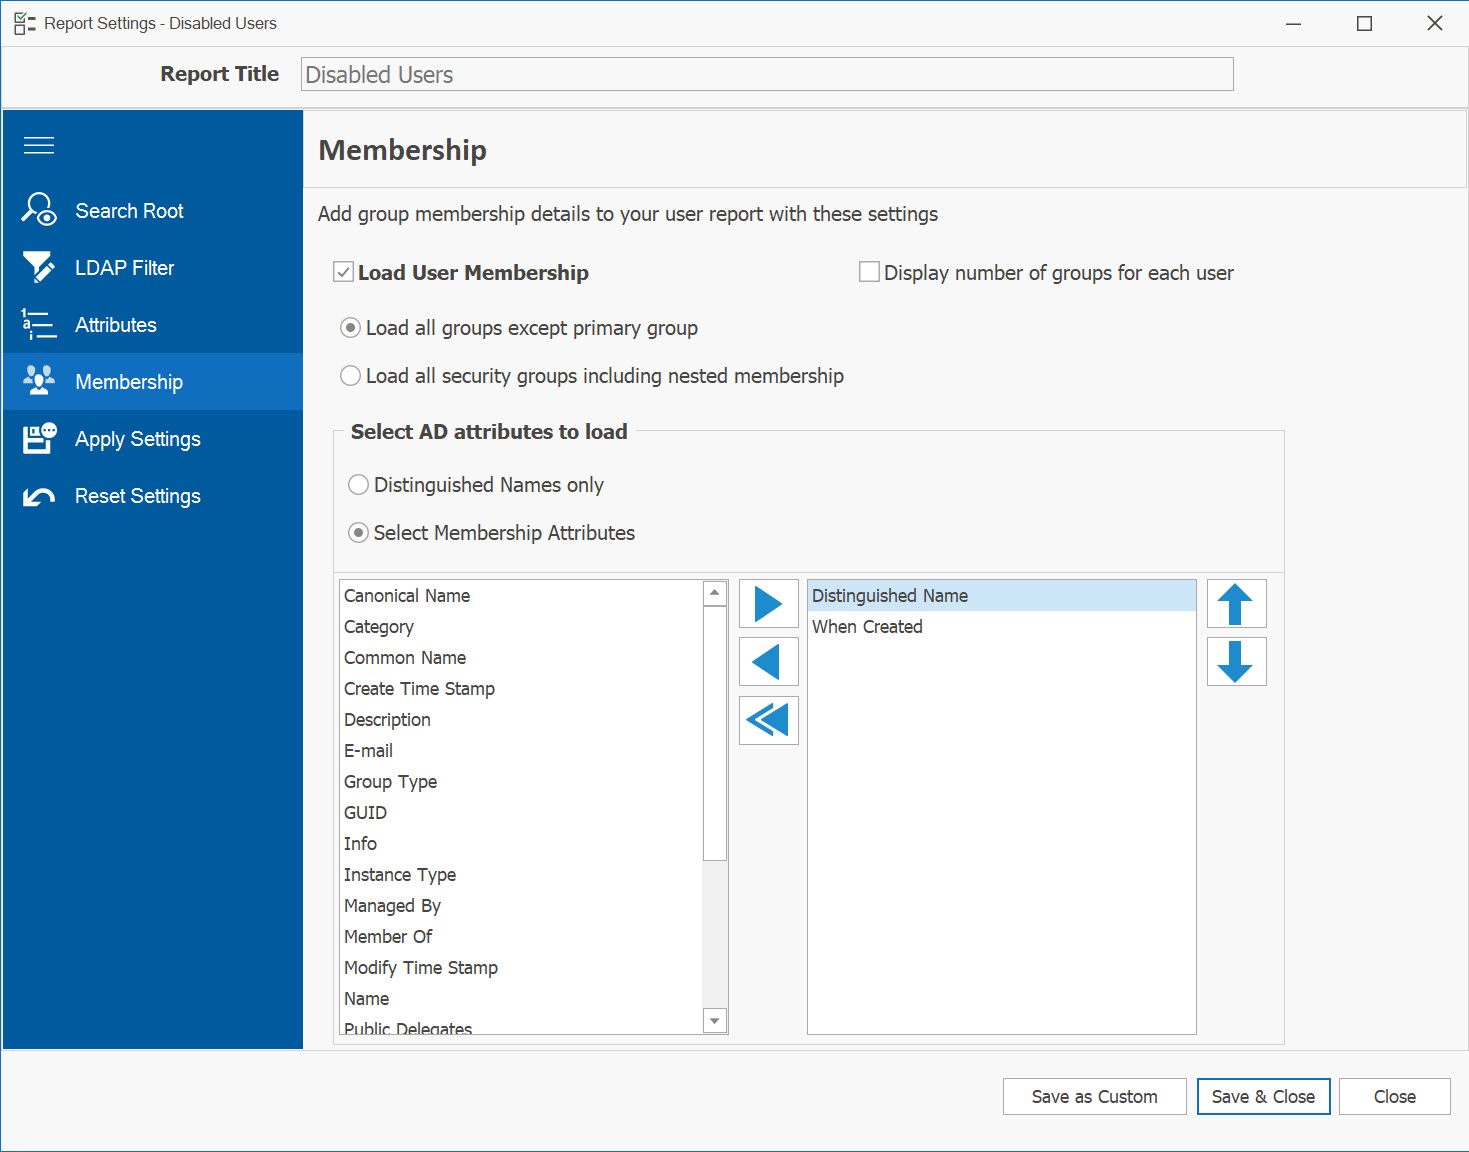
You can specify whether to load only direct members or include nested membership. For Group Members, you can also choose to include nested group names, primary group membership, and translate foreign security principals to NT Account names.
You can determine whether to load only distinguished names or select specific member attributes. If you opt for Select Membership Attributes, you can choose the columns/attributes to load for your membership report.
Saving Report
Multiple options are available for saving your report.
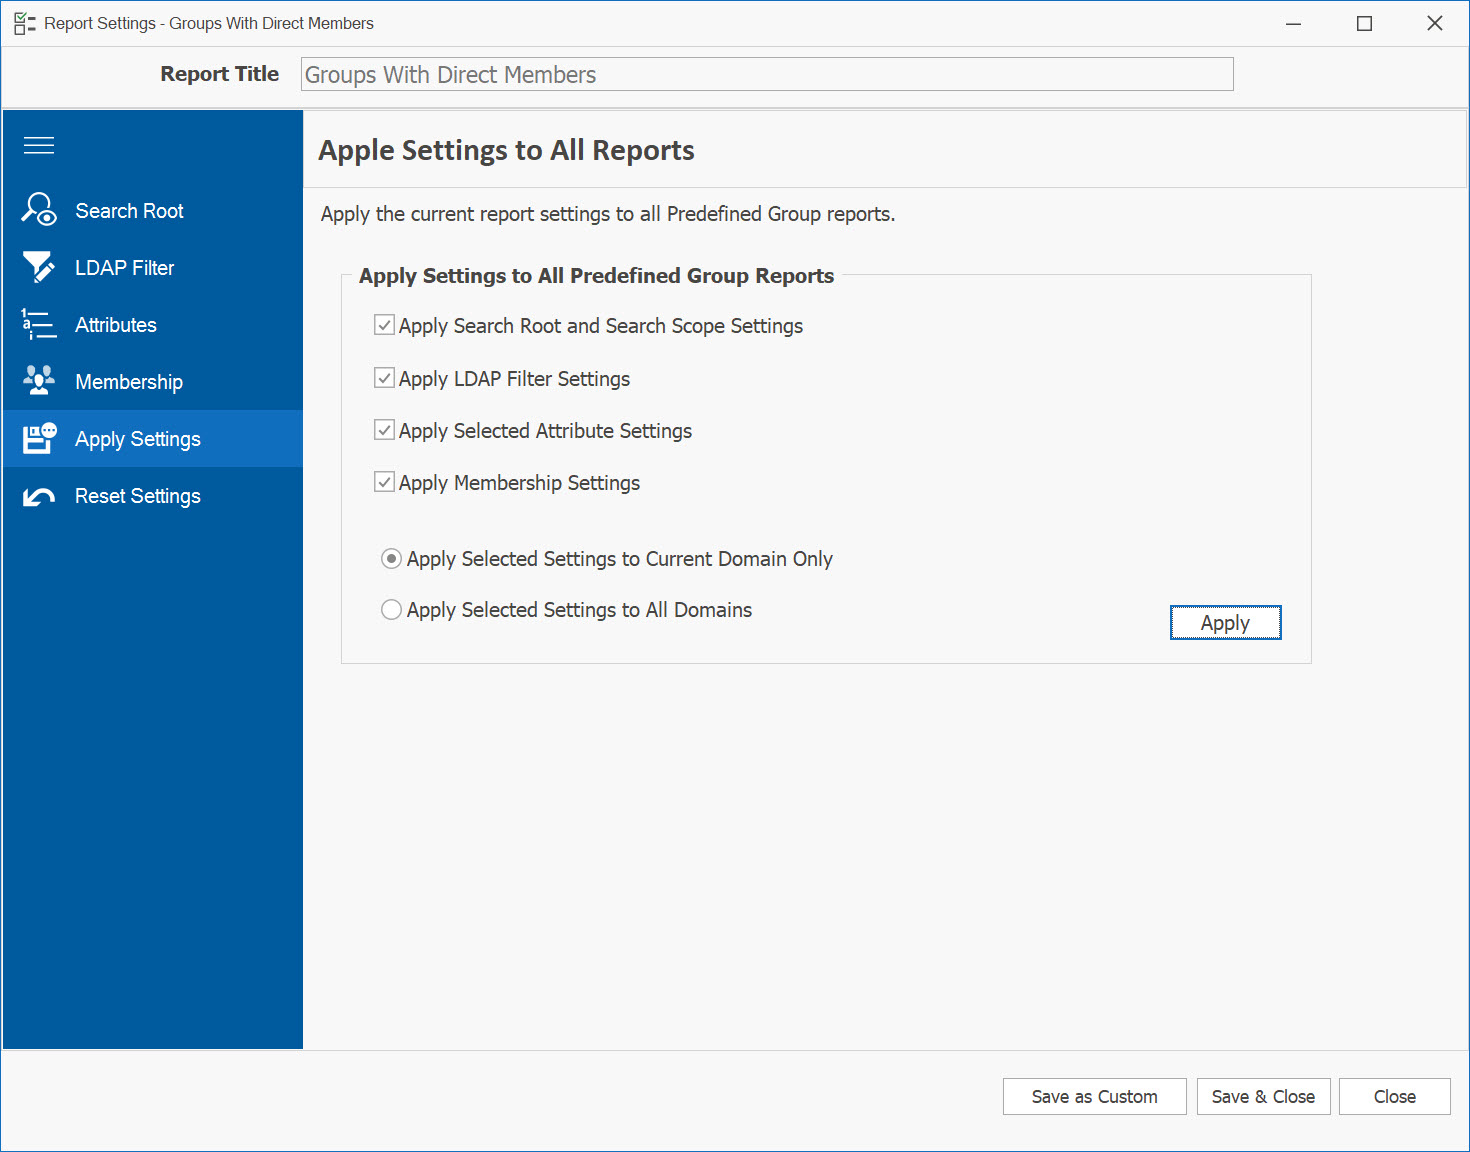
Applying settings to all reports
Once you have finished making modifications, you can apply these new settings to the entire report category (e.g., user, group, etc.). In this page, you can choose which settings to apply. If you wish to make these settings available for all reports in all domains, select Apply Selected Settings for All Domains and click Apply.
Updating existing report
To save the modifications to your existing report, click Save & Close. The report will be saved and reloaded with the updated settings.
An alternative option is to save your report as a Custom report by clicking Save as Custom. In the pop-up window, provide a new report title and click Save.
You can also save this custom report for all domains by selecting Save this report for All domains. The report will be reloaded and saved under the Custom reports tab.
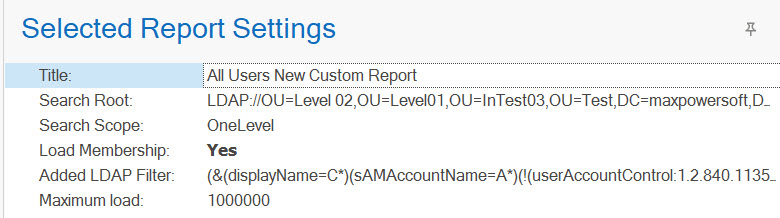
When you run your report, the current report settings will be displayed in the "Selected Report Settings" window.