- Install AD Reports
- Uninstall AD Reports
- Register AD Reports
- Run a report
- Run Azure User Reports
- Azure Authentication Settings
- Create Custom Azure Reports
- Create Custom Reports
- Use Report Wizard
- Apply LDAP Filter to other Reports
- Save Reports for All Domains
- Load User Membership
- Load Group Members
- Generate a report: Users in Group
- Generate a report: Users Not in Group
- Run a report with not-replicated attributes
- Export a report
- Preview, Print, Email
- Add, Edit Domain
- Update Domain Credentials
- Schedule Reports
- Use Scheduler Service
- Test Scheduler Service
- Exclude Domain Controllers
- Add Company Logo
- Set Email Settings
- Save and Load Report Settings
- Enable High DPI Support
How to Run Azure User Reports
Azure Reports (Beta) allows you to generate reports for users in your Azure Entra ID (formerly Azure Active Directory). This feature provides access to pre-built user reports and the ability to work with custom reports for your Azure environment.
1. Navigate to Azure Reports and Select a User Report
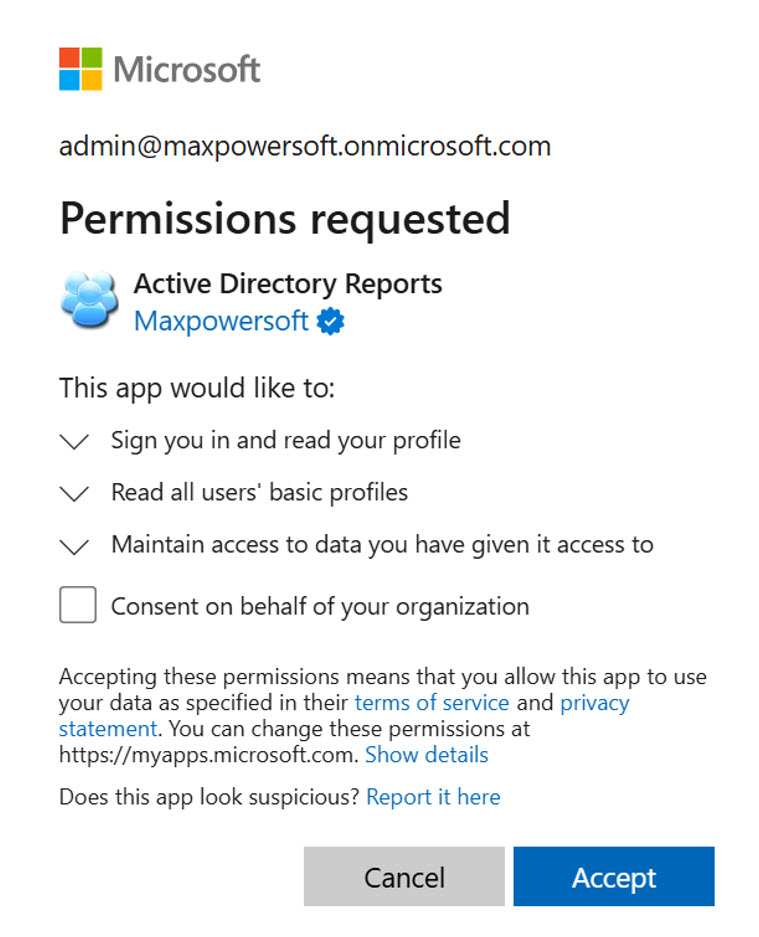
Note: When you run Azure Reports for the first time, a Microsoft consent screen will be displayed. You must grant the necessary permissions for AD Reports to access your Azure Entra ID data. After granting consent, the report will be loaded automatically.

Tip: To manage your Azure authentication settings, such as signing out, switching accounts, or refreshing your token, see Azure Authentication Settings.
To run an Azure user report:
- Click on "Azure Reports (Beta)" in the left navigation panel
- Expand the "User Reports" category in the report tree
- Select one of the available reports to load the data

The following pre-built user reports are available:
- All Users - Displays all users in your Azure Entra ID
- Enabled Users - Shows only users with enabled accounts
- Disabled Users - Shows only users with disabled accounts
- Admins - Lists users with administrative privileges
- Guest Users - Displays guest user accounts
Once you select a report, the results will be displayed in the main panel showing user information. You can use the search box at the top to filter results.
2. Working with Custom Reports
You can access existing custom Azure reports by expanding the "Custom Reports" category in the report tree. Right-click on a custom report to access the following options:
- Edit Custom Report - Modify the report's filters and criteria
- Delete Custom Report - Remove the custom report
- Duplicate Custom Report - Create a copy to use as a template for a new report
- Export Custom Report Settings - Save the report configuration to a file
- Load Report - Run the custom report to view results

Note: To create a new custom Azure report from scratch, see Create Custom Azure Reports.
3. Search and Filter Reports
Use the "Find" search box located above the report tree to quickly locate specific reports by typing keywords. The tree will automatically filter to show matching results.
In the report results, you can also drag column headers to group data and apply additional filtering using the filter icons in the column headers.
4. Export and Print Options
Azure reports support the same export and print functionality as AD Reports. You can:
- Export reports to PDF, Excel, or other formats using the "Export Report To" button
- Print or preview reports using the "Print Preview" button
- Customize the report layout using the "Customize Report" button
For more information on exporting and printing, see Export a report and Preview, Print, Email.
Note: Azure Reports is currently in Beta. If you encounter any issues or have feedback, please Contact us.